9.2 KiB
title, date, comments, lastmod, draft, description, tags, author
| title | date | comments | lastmod | draft | description | tags | author | |||||
|---|---|---|---|---|---|---|---|---|---|---|---|---|
| Setting up Gitea Actions with Tailscale | 2023-12-10T17:22:11-05:00 | true | 2023-12-10T17:22:11-05:00 | false |
|
Dave Gallant |
In this post I'll go through the process of setting up Gitea Actions and Tailscale, unlocking a simple and secure way to automate workflows.
What is Gitea?
Gitea is a lightweight and fast git server that has much of the same look and feel as github. I have been using it in my homelab to mirror repositories hosted on other platforms such as github and gitlab. These mirrors take advantage of the decentralized nature of git by serving as "backups". One of the main reasons I hadn't been using it more often was due to the lack of integrated CI/CD. This is no longer the case.
Gitea Actions
Gitea Actions have made it into the 1.19.0 release. This feature had been in an experimental state up until 1.21.0 and is now enabled by default 🎉.
So what are they? If you've ever used GitHub Actions (and if you're reading this, I imagine you have), these will look familiar. Gitea Actions essentially enable the ability to run github workflows on gitea. Workflows between gitea and github are not completely interopable, but a lot of the same workflow syntax is already compatible on gitea. You can find a documented list of unsupported workflows syntax.
Actions work by using a custom fork of nekos/act. Workflows run in a new container for every job. If you specify an action such as actions/checkout@v4, it defaults to downloading the scripts from github.com. To avoid internet egress, you could always clone the required actions to your local gitea instance.
Actions (gitea's implementation) has me excited because it makes spinning up a network-isolated environment for workflow automation incredibly simple.
Integration with Tailscale
2024-02-10: I had originally written this post to include Tailscale-Traefik Proxy Integration, but have since removed it in favour of Tailscale Serve after learning from this example. This simplifies the setup and reduces the number of moving parts.
So how does Tailscale help here? Well, more recently I've been exposing my self-hosted services using Tailscale Serve. This allows for a nice looking dns name (i.e. gitea.my-tailnet-name.ts.net), automatic tls certificate management, and optionally allowing the address to be publically accessible (by using Funnel).
Deploying Gitea, Traefik, and Tailscale
In my case, the following is already set up:
My preferred approach to deploying code in a homelab environment is with docker compose. I have deployed this in a LXC on Proxmox. You could run this on a virtual machine or a physical host as well.
The docker-compose.yaml file looks like:
version: "3.7"
services:
  gitea:
    image: gitea/gitea:1.21.1
    container_name: gitea
    network_mode: service:ts-gitea
    environment:
      - USER_UID=1000
      - USER_GID=1000

      - GITEA__server__DOMAIN=gitea.my-tailnet-name.ts.net
      - GITEA__server__ROOT_URL=https://gitea.my-tailnet-name.ts.net
      - GITEA__server__HTTP_ADDR=0.0.0.0
      - GITEA__server__LFS_JWT_SECRET=my-secret-jwt
    restart: always
    volumes:
      - ./data:/data
      - /etc/timezone:/etc/timezone:ro
      - /etc/localtime:/etc/localtime:ro
  ts-gitea:
    image: tailscale/tailscale:v1.58
    container_name: ts-gitea
    hostname: gitea
    environment:
      - TS_AUTHKEY=<FILL THIS IN>
      - TS_SERVE_CONFIG=/config/gitea.json
      - TS_STATE_DIR=/var/lib/tailscale
    volumes:
      - ${PWD}/state:/var/lib/tailscale
      - ${PWD}/config:/config
      - /dev/net/tun:/dev/net/tun
    cap_add:
      - net_admin
      - sys_module
    restart: unless-stopped
Note that you must specify a TS_AUTHKEY in the ts-gitea service. You can generate an auth key here.
config/gitea.json:
{
  "TCP": { "443": { "HTTPS": true } },
  "Web":
    {
      "${TS_CERT_DOMAIN}:443":
        { "Handlers": { "/": { "Proxy": "http://127.0.0.1:3000" } } },
    },
  "AllowFunnel": { "${TS_CERT_DOMAIN}:443": false },
}
After adding the above configuration, running docker compose up -d should be enough to get an instance up and running. It will be accessible at https://gitea.my-tailnet-name.ts.net from within the tailnet.
Something to consider is whether or not you want to use ssh with git. One method to get this to work with containers is to use ssh container passthrough. I decided to keep it simple and not use ssh, since communicating over https is perfectly fine for my use case.
Theming
I discovered some themes for gitea here and decided to try out gruvbox.
I added the theme by cloning theme-gruvbox-auto.css into ./data/gitea/public/assets/css. I then added the following to environment in docker-compose.yml:
- GITEA__ui__DEFAULT_THEME=gruvbox-auto
- GITEA__ui__THEMES=gruvbox-auto
After restarting the gitea instance, the default theme was applied.
Connecting runners
I installed the runner by following the docs. I opted for installing it on a separate host as recommended in the docs. I used the systemd unit file to ensure that the runner comes back online after system reboots. I installed tailscale on the gitea runner as well, so that it can be part of the same tailnet as the main instance.
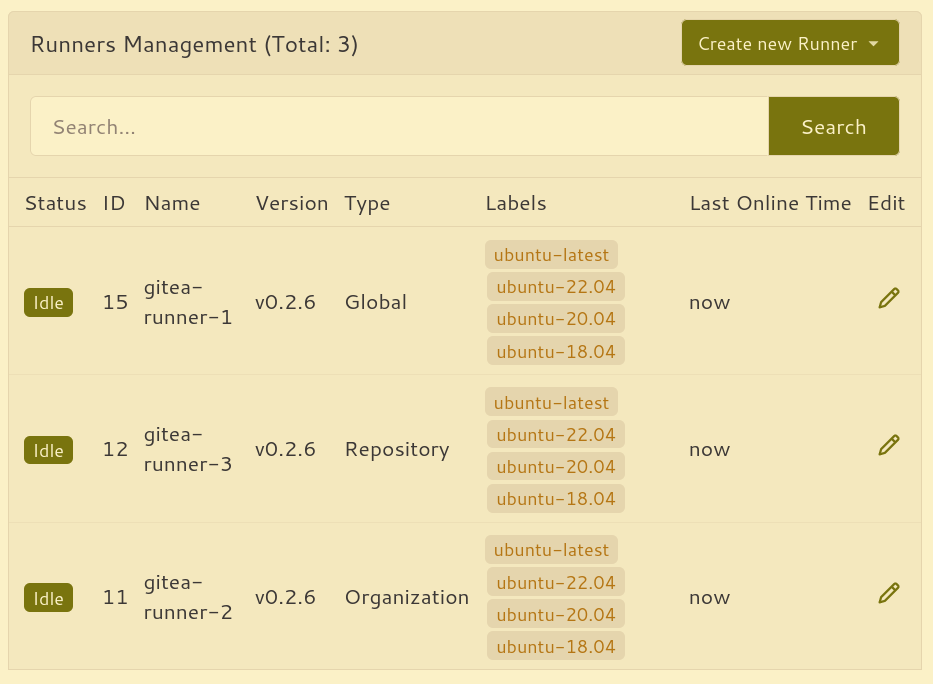
After registering this runner and starting the daemon, the runner appeared in /admin/actions/runners. I added two other runners to help with parallelization.
Running a workflow
Now it's time start running some automation. I used the demo workflow as a starting point to verify that the runner is executing workflows.
After this, I wanted to make sure that some of my existing workflows could be migrated over.
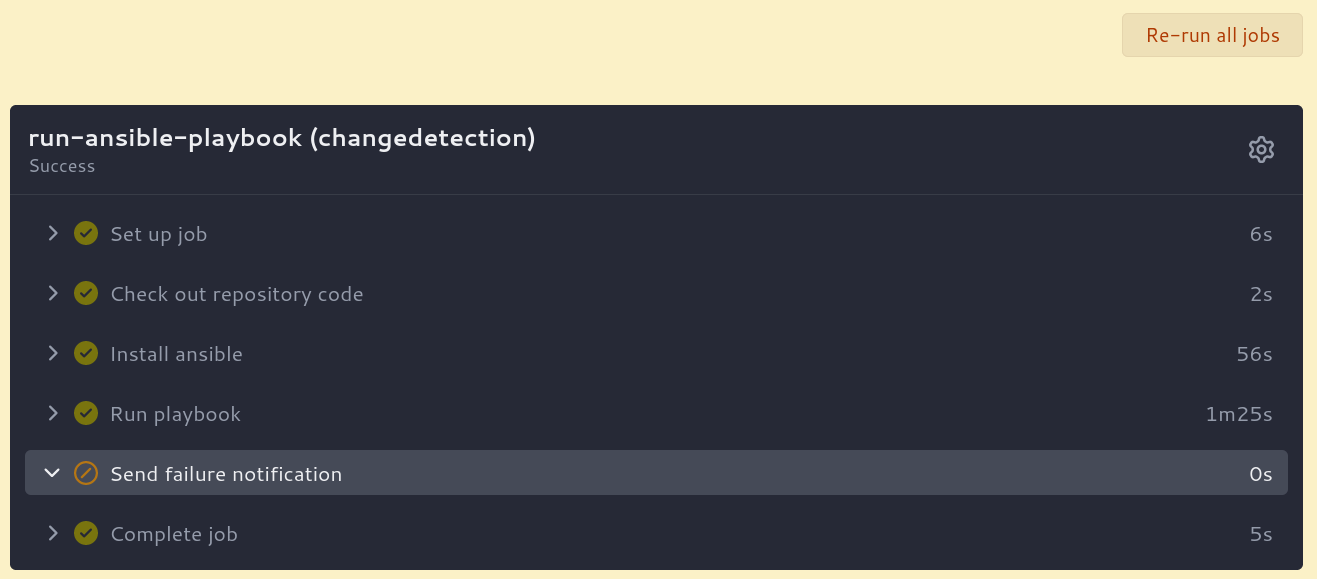
The following workflow uses a matrix to run a job for several of my hosts using ansible playbooks that will do various tasks such as patching os updates and updating container images.
name: Run ansible
on:
  push:
  schedule:
    - cron: "0 */12 * * *"

jobs:
  run-ansible-playbook:
    runs-on: ubuntu-latest
    steps:
      - name: Check out repository code
        uses: actions/checkout@v4
      - name: Install ansible
        run: |
          apt update && apt install ansible -y
      - name: Run playbook
        uses: dawidd6/action-ansible-playbook@v2
        with:
          playbook: playbooks/main.yml
          requirements: requirements.yml
          options: |
            --inventory inventory
      - name: Send failure notification
        uses: dawidd6/action-send-mail@v3
        if: always() && failure()
        with:
          server_address: smtp.gmail.com
          server_port: 465
          secure: true
          username: myuser
          password: ${{ secrets.MAIL_PASSWORD }}
          subject: ansible runbook failed
          to: me@davegallant.ca
          from: RFD Notify
          body: |
            ${{ github.server_url }}/${{ github.repository }}/actions/runs/${{ github.run_number }}
And voilà:
You may be wondering how the gitea runner is allowed to connect to the other hosts using ansible? Well, the nodes are in the same tailnet and have tailscale ssh enabled.
Areas for improvement
One enhancement that I would like to see is the ability to send notifications on workflow failures. Currently, this doesn't seem possible without adding logic to each workflow.
Conclusion
Gitea Actions are fast and the resource footprint is minimal. My gitea instance is currently using around 250mb of memory and a small fraction of a single cpu core (and the runner is using a similar amount of resources). This is impressive since many alternatives tend to require substantially more resources. It likely helps that the codebase is largely written in go.
By combining gitea with the networking marvel that is tailscale, running workflows becomes simple and fun. Whether you are working on a team or working alone, this setup ensures that your workflows are securely accessible from anywhere with an internet connection.

